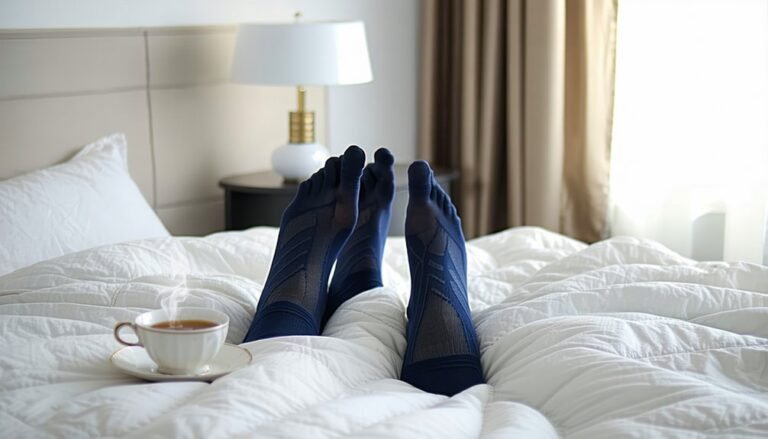
How Do You Get a Vertical Tie Dye on Socks
To create a vertical tie-dye effect on socks, start by gathering cotton or rayon socks, dye, and gloves. Fold the socks accordion-style from toe to top and secure with rubber bands. Apply dye in vertical stripes, alternating colors for contrast. Let the dye set for 6 to 8 hours, then rinse with cold water until it runs clear. Finally, dry the socks completely before wearing them. Discover more tips and techniques to elevate your tie-dye projects!
Gather Your Materials

To commence your vertical tie-dye adventure, you'll need to gather a few essential materials that will transform your plain socks into vibrant works of art. Start with the right fabric choices; cotton or rayon socks are ideal, as they absorb dye beautifully. Next, pick up some rubber bands or string—these will help create the vertical patterns you envision. You'll also need a spray bottle or squeeze bottles for applying the dye, along with protective gloves to keep your hands safe. Don't forget a workspace covered in plastic or old newspapers to prevent any mess. Finally, gather your chosen dye—be sure to select high-quality fabric dye that works well with your materials. With these essentials in hand, you're ready to explore various tie-dye techniques!
Choose Your Dye Colors
How can you choose the perfect dye colors for your vertical tie-dye socks? Start by considering color combinations that resonate with you. Think about color psychology: warm colors like reds and oranges evoke energy, while cool colors like blues and greens promote calmness. Experiment with contrasting shades for a vibrant look, or opt for analogous colors for a more harmonious feel. Don't forget to verify your dye is safe for fabric and skin—always check the labels. You might want to use natural dyes as a safer alternative. Ultimately, pick colors that reflect your personality or mood; they'll turn your socks into a canvas of self-expression. Happy dyeing!
Prepare Your Socks
Before you start your vertical tie dye adventure, it's essential to choose the right sock material—cotton blends work best for vibrant results. Once you've picked your socks, give them a thorough wash to eliminate any residues that might hinder the dye absorption. This prep work sets the stage for stunning, colorful patterns that pop!
Choose Your Sock Material
While you might be tempted to grab any old pair of socks for your vertical tie dye project, choosing the right material is essential for achieving vibrant, long-lasting results. Not all sock types will take the dye the same way, so consider these fabric blends:
- Cotton: Absorbs dye beautifully, ensuring vivid colors.
- Polyester-Cotton Blend: Offers durability while still allowing decent dye uptake.
- Bamboo: Eco-friendly and absorbs dye well, providing unique shades.
- Wool: Though less common, it can create stunning, rich colors if treated properly.
Wash Before Dyeing
To guarantee your vertical tie dye project yields the best results, washing your socks before dyeing is an essential step that shouldn't be overlooked. This prewash importance stems from the need to remove any residues from manufacturing or packaging that could inhibit dye absorption. Start by using a gentle, fragrance-free detergent to prepare your fabric properly, ensuring it's free from dirt and oils. Warm water works best, as it helps open the fibers, allowing the dye to penetrate deeply. After washing, rinse thoroughly to eliminate any soap, then let your socks air dry. This careful fabric preparation sets a solid foundation for vibrant, long-lasting colors, ensuring your tie dye masterpiece turns out as stunning as you envisioned!
Create the Vertical Tie-Dye Pattern
As you immerse yourself in the vibrant world of vertical tie-dye, you'll quickly discover that the secret to achieving a stunning pattern lies in the technique of folding and binding your socks. By employing effective vertical design techniques, you can create eye-catching tie dye patterns that stand out. Here's how to get started:
- Gather your materials: You'll need socks, rubber bands, and a flat surface.
- Prepare the socks: Lay them flat and smooth out any wrinkles.
- Fold vertically: Create an accordion fold from the toe to the top.
- Bind securely: Use rubber bands to hold the fold tightly in place.
With these steps, you're on your way to creating a beautiful vertical tie-dye effect. Always remember to wear gloves for safety!
Apply the Dye

Now that you've crafted your vertical tie-dye pattern, it's time to gather your materials—dye solutions, squeeze bottles, and gloves are essential. You'll mix your dyes with care, ensuring each hue is vibrant and ready to saturate your fabric. As you apply the dye evenly, watch how the colors blend and transform, bringing your socks to life with each precise squeeze.
Gather Required Materials
Gathering the right materials for applying dye to your socks is essential for achieving that eye-catching vertical tie-dye effect. Understanding tie dye history and color theory can enhance your creative process, guaranteeing you choose colors that complement each other beautifully. Here's what you'll need:
- White cotton socks – Natural fibers absorb dye better, allowing for vibrant colors.
- Fabric dye – Select high-quality, non-toxic dyes for safety and longevity.
- Rubber bands – These will help create the vertical design by securing the fabric.
- Gloves – Protect your hands from staining and ensure safe handling of the dye.
With these materials in hand, you're ready to plunge into the exciting world of vertical tie-dyeing!
Prepare Dye Solutions
With your materials assembled, it's time to mix your dye solutions to achieve that striking vertical effect on your socks. Start by filling your containers with water, then gradually add dye powder according to the manufacturer's instructions. Pay close attention to dye concentration; a higher concentration yields more vibrant colors, while a lower concentration creates softer shades. Always wear gloves and a mask to guarantee safety precautions are followed, preventing direct skin contact and inhalation of dye particles. Stir the mixture thoroughly until the dye is fully dissolved. If you're using multiple colors, label each container to avoid confusion. Preparing these solutions carefully sets you up for a successful tie-dye experience, so take your time and enjoy the process!
Apply Dye Evenly
Begin by securing your socks on a flat surface, ensuring they're ready to absorb the vibrant colors you've prepared. To achieve even dye distribution and avoid color bleeding, follow these steps:
- Dye Application: Use squeeze bottles for precision, applying dye in straight lines from top to bottom.
- Layering: Apply multiple layers of dye, allowing each to soak in before adding more, ensuring consistent color intensity.
- Patience: Wait a few minutes after applying each color; this minimizes mixing and enhances vibrancy.
- Check for Gaps: Inspect the socks for any missed spots, reapplying dye as necessary to achieve that beautiful, uniform look.
Set the Dye
Setting the dye is an essential step in the vertical tie dye process, guaranteeing that your vibrant colors stay true and don't wash out. To achieve this, you'll want to use effective dye fixing techniques. After applying your dye, allow the socks to sit for at least 6 to 8 hours in a warm environment. This helps the dye bond with the fabric fibers. If you're using a specific dye, check the manufacturer's instructions for any additional setting methods. For an added layer of security, consider applying a heat setting technique—like placing the dyed socks in a dryer on low heat for about 15 minutes. This step not only enhances color durability but also guarantees your creations are safe for washing.
Rinse and Wash Your Socks
After letting your socks soak in vibrant hues, it's crucial to rinse and wash them properly to lock in those colors. Using the right rinse techniques and wash methods prevents unwanted bleeding while preserving your masterpiece. Here's how you can do it safely:
- Rinse with Cold Water: Gently run cold water over your socks until the water runs clear, removing excess dye.
- Use a Mild Detergent: Apply a small amount of gentle detergent to maintain color vibrancy while cleaning.
- Hand Wash: Avoid machine washing; instead, gently agitate your socks in a basin to prevent damage.
- Air Dry: Lay your socks flat to dry, avoiding direct sunlight to prevent fading.
These steps guarantee your tie-dyed socks remain colorful and safe for wear!
Dry and Enjoy Your New Socks

With your socks freshly rinsed and dried, it's time to revel in the vibrant patterns you've created. For ideal sock care, choose a gentle drying technique. Lay your socks flat on a clean, dry towel to absorb excess moisture; avoid direct sunlight to prevent fading. Alternatively, you can hang them to dry in a well-ventilated area. If you prefer using a dryer, select a low heat setting to protect the fabric and colors. Once completely dry, admire the unique designs and texture. Slip them on and feel the joy of your hard work! Remember, proper drying techniques not only enhance the longevity of your socks but also maintain their stunning appearance for many wears to come. Enjoy your colorful creations!
Tips for Future Tie-Dye Projects
While you may have mastered the basics of tie-dyeing socks, there's always room for creativity and improvement in future projects. Consider these tips to elevate your techniques:
- Experiment with Color Combinations: Don't shy away from bold hues; mixing unexpected colors can yield stunning results.
- Explore Different Dye Techniques: Try spiral, bullseye, or ombre effects to keep your designs fresh and unique.
- Pre-Soak Your Fabric: Using a soda ash solution can help the dye adhere better, enhancing vibrancy.
- Always Wear Gloves and Work in a Well-Ventilated Area: Safety first! Protect your skin and respiratory health while enjoying your art.
Frequently Asked Questions
Can I Use Food Coloring for Tie-Dyeing Socks?
Yes, you can use food coloring for tie-dyeing socks! Just remember, there are food coloring alternatives like fabric dyes. Use safe tie-dye techniques, ensuring the colors set properly for vibrant, long-lasting results without risk.
How Long Should I Let the Dye Set?
You should let the dye set for at least six to eight hours. This guarantees maximum color intensity and allows the dye to bond safely with the fabric, creating vibrant, long-lasting designs you'll love.
What Type of Fabric Works Best for Tie-Dye?
For tie-dye, you'll want cotton blends; they excel in dye absorption, ensuring vibrant colors. Fabrics like 100% cotton or cotton-polyester mixes work best, giving you stunning results while keeping your dyeing experience safe and enjoyable.
Is It Safe to Tie-Dye Socks With Kids?
Absolutely, tie-dying socks with kids can be a blast! Just guarantee you've got safety precautions in place and use kid-friendly materials. With a splash of care, creativity blooms and fun flows like vibrant colors.
Can I Use a Washing Machine to Set the Dye?
You can't rely solely on machine washing to set the dye. Instead, try soaking your dyed socks in a vinegar solution first, then wash them on a gentle cycle to help secure those vibrant colors safely.