How to Tie Socks for Spiral Tie Dye
To create a spiral design for tie-dye socks, start by laying the sock flat and gripping it at the center. Twist the sock in one direction, forming a tight spiral. Once you have a nice twist, secure the spiral with rubber bands, crisscrossing them to hold the shape. Now you're ready to apply dye to create your masterpiece. If you're curious about choosing colors and the dyeing process, there's more to explore!
Gather Your Materials

Before you immerse yourself in the fun of tie-dyeing, you'll want to gather a few essential materials. First, choose your sock materials—cotton socks work best since they absorb dye beautifully. Next, pick out your dye types; you can use fiber-reactive dyes for vibrant colors or natural dyes for a more eco-friendly approach. Don't forget rubber gloves to protect your hands from staining, and a plastic table cover to keep your workspace clean. It's also handy to have squeeze bottles for applying dye and rubber bands for securing your socks. Finally, grab some water and a bucket for rinsing. With these materials in hand, you're all set to plunge into the colorful world of tie-dyeing!
Prepare Your Socks
Before you start tying, it's crucial to choose the right socks; cotton blends work best for vibrant colors. Gather your supplies, including rubber bands and scissors, to make sure you're ready for the creative process ahead. With everything in place, you're set to transform your plain socks into a colorful masterpiece!
Choose the Right Socks
Choosing the right socks is essential for a successful tie-dye project, as the fabric and color of your socks will greatly impact the final result. Look for cotton or a cotton blend, as these sock materials absorb dye well, ensuring vibrant and lasting colors. Avoid synthetic materials, which might not take the dye effectively and can produce uneven results. When selecting color combinations, think about what hues complement each other; bold contrasts can create eye-catching designs, while softer tones provide a more subtle effect. Make sure to choose socks that are clean and free from any fabric softeners, as these can affect dye absorption. Ultimately, the right choice sets the stage for your creative masterpiece!
Gather Necessary Supplies
Now that you've picked out the perfect socks for your tie-dye project, it's time to gather all the necessary supplies to get started. First, choose your sock types—cotton or a cotton blend works best for vibrant dye absorption. Next, you'll need fabric dye in your chosen colors, along with rubber bands for securing the socks. Don't forget gloves to protect your hands, and a plastic tablecloth or newspaper to cover your workspace for easy cleanup. For dye techniques, consider squeeze bottles for precise application or spray bottles for a more random effect. Finally, have water and a bucket nearby for rinsing. With everything ready, you can plunge into the fun world of tie-dyeing!
Choose Your Tie Dye Colors
How do you want your tie-dye creation to look? Start by exploring color combinations that excite you! Use a color wheel to guide your choices; complementary colors like blue and orange can create a striking effect, while analogous colors such as blue, green, and teal offer a softer blend. Think about how these colors will interact on your socks. If you're aiming for a vibrant look, consider bright hues like hot pink or electric yellow. For a more muted palette, earth tones like rust or olive might be perfect. Remember, safety is key—wear gloves to protect your hands and work in a well-ventilated area. With the right colors, your socks will be a stunning masterpiece!
Create the Spiral Design
Creating a spiral design on your socks can transform them into a vibrant work of art. To achieve this using spiral techniques, follow these steps for effective dye placement:
- Center the Sock: Hold the sock by its center, making sure it's smooth and free of wrinkles.
- Twist the Sock: Twist the sock in one direction, creating a spiral shape. Keep twisting until it's tightly coiled.
- Pinch and Lift: Pinch the center of the spiral and lift, ensuring it stays intact.
- Dye Placement: Using squeeze bottles, apply your chosen dyes in sections around the spiral. Consider using contrasting colors for a stunning effect.
Remember to wear gloves and work in a well-ventilated area for safety while dyeing!
Secure the Socks With Rubber Bands

Now that you've created your spiral design, it's time to secure your socks with rubber bands. Choose bands that are strong enough to hold your design in place without snapping, and think about where you'll position them for the best effect. Make certain to tighten them adequately to guarantee the dye stays where you want it, setting the stage for vibrant results.
Choosing the Right Bands
While you might think any rubber band will do, selecting the right bands for securing your socks is essential to achieving the best tie-dye results. The appropriate band types and sizes will guarantee your dye patterns come out beautifully. Here's what to take into account when choosing your bands:
- Thickness: Opt for thicker bands that can hold the fabric firmly without breaking.
- Elasticity: Choose bands with good elasticity for a snug fit around your socks.
- Size: Make sure you pick band sizes that can accommodate the bulk of the folded socks.
- Durability: Look for bands that won't snap easily during the dyeing process.
Band Placement Techniques
To achieve stunning tie-dye patterns on your socks, the way you place your rubber bands is essential. Start by twisting the sock from the toe to the top, creating a spiral shape. This technique allows for unique spiral variations in your dye application. Once twisted, use your rubber bands to secure the sock at intervals along the spiral. Experiment with different band techniques—tightening some bands more than others can create distinct sections that absorb dye differently. Remember, safety first! Make sure your rubber bands are not too tight, as this can damage the fabric and make it difficult for dye to penetrate. With careful band placement, you'll set the stage for vibrant, eye-catching designs on your socks.
Tightening for Best Results
After securing your sock with rubber bands, it's time to focus on tightening them for the best results. Using effective tightness techniques will enhance your spiral precision, ensuring vibrant patterns. Here's how to do it:
- Choose the Right Bands: Use thick rubber bands for a strong hold.
- Apply Even Pressure: As you wrap the bands, maintain consistent pressure to avoid uneven dye absorption.
- Space Wisely: Position the bands about an inch apart for a balanced look.
- Test the Flexibility: After securing, gently tug the sock; it should be snug but not overly tight.
Apply the Dye
Once you've prepped your socks and gathered your dye, it's time to release your creativity and apply the dye. Start by using various dye application techniques, like squirt bottles or brushes, to create your desired patterns. For a spiral effect, concentrate the dye in the center and work outward, allowing colors to blend naturally. If you want vibrant shades, apply more dye; for softer hues, use less. Remember to wear gloves to protect your hands, and work in a well-ventilated area to guarantee safety. As you apply the dye, don't hesitate to experiment—mix colors for unique blends, but be cautious to avoid muddying the hues. Enjoy the process and let your imagination guide you!
Set the Dye and Let It Cure
With your dye applied and the vibrant colors taking shape, the next step is to set the dye and let it cure. This process guarantees your designs stay bold and beautiful. Here's how to do it safely:
- Wrap your socks in plastic wrap or place them in a sealable plastic bag. This keeps moisture in while preventing excess dye from leaking.
- Choose a warm spot to place your wrapped socks, as heat helps with dye setting.
- Let them cure for the recommended curing time, typically 6 to 24 hours, depending on the dye.
- Check periodically to guarantee they're staying moist, adding water if necessary.
Rinse and Dry Your Tie Dyed Socks
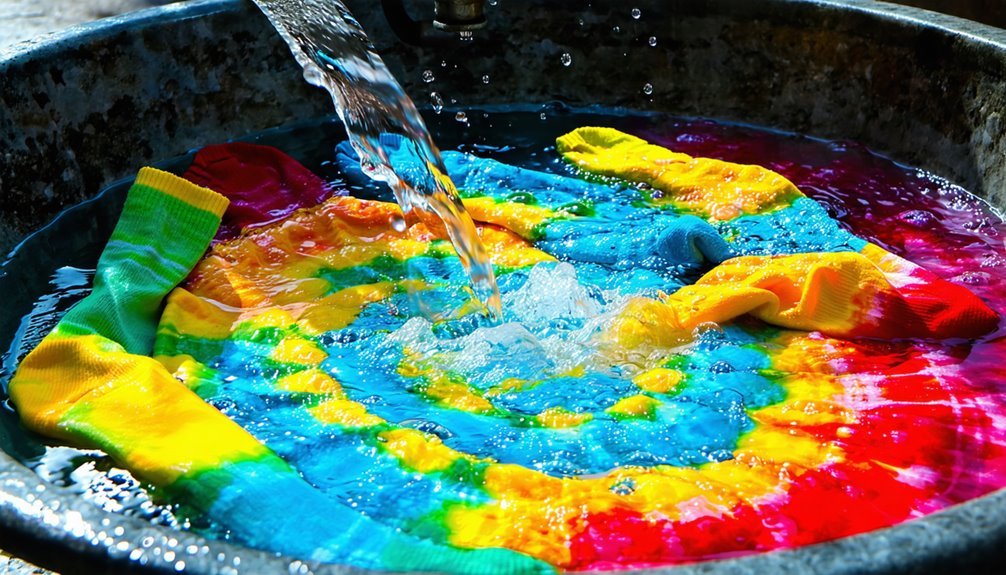
Now that your socks have cured and the colors are set, it's time to rinse away the excess dye and prepare your vibrant creations for wear. Start with cold water, using rinsing techniques like gently squeezing the fabric to release dye without damaging your design. Rinse until the water runs clear, ensuring you remove any lingering pigment.
After rinsing, it's essential to dry your socks properly. Use drying methods that maintain the colors—air drying is best, so hang them in a shaded area to prevent fading from sunlight. If you prefer a quicker option, a low-heat dryer can work, but avoid high temperatures to protect the fabric. Your tie-dyed socks are now ready to rock!
Frequently Asked Questions
Can I Use Cotton-Blend Socks for Tie Dye?
Cotton-blend socks boast brilliant cotton properties, enhancing dye absorption. They'll soak up vibrant colors beautifully. Just guarantee you follow safety guidelines, like wearing gloves, to keep your hands safe while creating colorful creations!
How Long Should I Let the Dye Set?
You should let the dye set for at least six to eight hours, ensuring maximum color vibrancy. If possible, overnight is best for a safer, more vibrant result. Don't rush this step; patience pays off!
What Type of Rubber Bands Work Best?
When choosing rubber bands, consider different rubber types for durability. The band size's importance can't be overstated—larger bands offer better grip without snapping. Confirm they're non-toxic to keep your dyeing experience safe and enjoyable.
Are There Any Safety Precautions Needed?
When dyeing, always wear safety gear like gloves and goggles to protect yourself. After you're done, guarantee you perform a thorough workspace cleanup to remove any spills or stains, keeping your area safe and tidy.
Can I Tie Dye Socks in Multiple Colors?
Yes, you can tie dye socks in multiple colors! Choose vibrant color combinations, and apply dye in sections. Just make sure you wear gloves and cover your workspace to keep everything safe and mess-free. Enjoy the creative process!