Quick DIY Fixes for Holes in Socks (No Sewing Needed!)
Have you ever noticed how socks always seem to develop holes at the most inconvenient times? Fixing sock holes doesn't require sewing skills!
You can use iron-on fabric patches for a quick, stylish fix, or apply fabric glue around the hole's edges, pressing it together with reinforcement from an old sock.
Sock-saving adhesives like liquid stitch offer efficient mending, while a hot glue gun adds both repair and creative flair with colorful options.
Each technique extends sock life and reflects your personal touch. Discover more inventive ways to transform your socks.
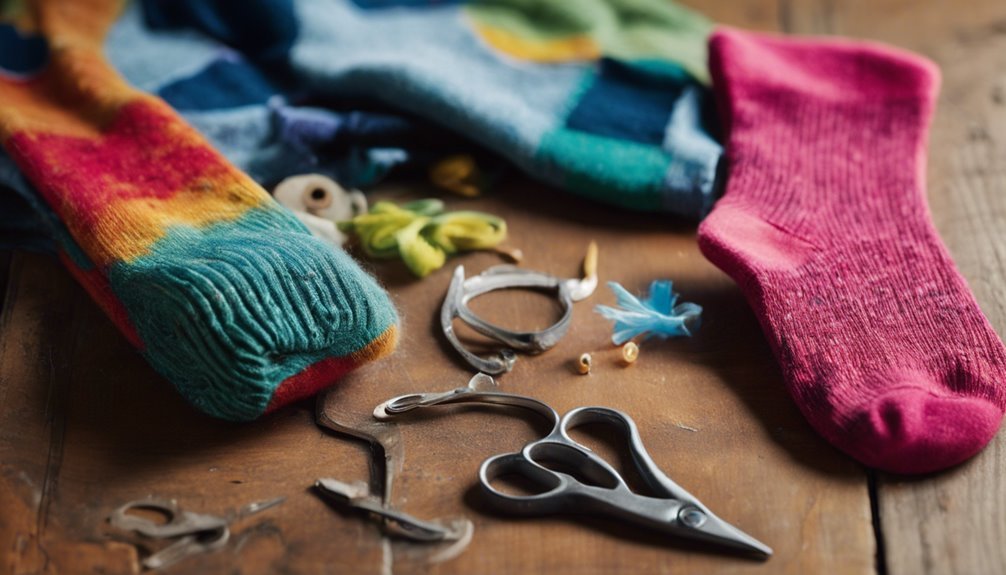
Patch It up With Iron-On Fabric

When your favorite pair of socks develops an unsightly hole, don't rush to toss them out just yet; instead, consider the quick and effective solution of patching it up with iron-on fabric. With a touch of creativity, you can transform those worn socks into unique fashion statements. Choose from a variety of iron-on designs that reflect your personality and bring new life to your old favorites. Whether you prefer bold geometric shapes or whimsical fabric patterns, the power is in your hands. Simply cut the patch to size, place it over the hole, and press with a hot iron. This simple fix not only mends the hole but also allows you to express your style in a vibrant, innovative way.
Use Fabric Glue for a Quick Fix
If you're looking for a quick and hassle-free solution to fix small holes in your socks, fabric glue might just be your best friend. It's an easy way to mend those pesky holes without the fuss of threading a needle. First, gather your fabric glue—available at most craft stores. For effective fabric glue applications, flatten your sock on a smooth surface. Dab a small amount of glue around the hole's edges, pressing the fabric together gently. Let it dry completely for a seamless repair.
For innovative sock repair tips, consider reinforcing the area with a small piece of fabric or mesh from an old sock. This adds durability and prevents further tearing, letting you enjoy your favorite socks longer without feeling constrained by imperfection.
Apply a Sock-Saving Adhesive
Though traditional methods like sewing may come to mind, applying a sock-saving adhesive offers a modern twist that's both effective and easy. Sock adhesives are the ultimate quick repair tool for those who crave simplicity and efficiency. With just a small dab of adhesive, you can mend your favorite socks in minutes without a needle in sight.
Here's a quick guide to sock adhesives:
| Type | Drying Time | Durability |
|---|---|---|
| Fabric Glue | 30 minutes | Medium |
| Liquid Stitch | 10 minutes | High |
| Super Glue Gel | 5 minutes | Very High |
Embrace this freedom-filled method as you simply apply the adhesive around the hole, press the fabric together, and let it dry. It's fast, hassle-free, and keeps your socks in action.
Try a Heat-Activated Bonding Sheet
When you're ready to tackle those pesky sock holes, gather a heat-activated bonding sheet, a pair of scissors, and an iron. Cut the sheet to fit the hole, place it over the damaged area, and apply heat with your iron to guarantee a seamless bond. To maximize durability, press firmly and let it cool completely before wearing.
Materials and Tools Needed
To commence your sock-repair journey, gathering the right materials and tools is essential, and one innovative option is to try a heat-activated bonding sheet. This versatile tool works wonders across various sock types, offering a seamless fix without the fuss of sewing. Start by ensuring material compatibility—some bonding sheets work best with cotton, while others are suited for synthetic blends. Your toolbox should include a pair of scissors for cutting the bonding sheet to size, and an iron or heat press to activate the adhesive. Don't forget a pressing cloth to protect your socks from direct heat. With these tools at your disposal, you're free to explore creative, no-sew repairs that'll have your socks looking as good as new in no time.
Applying the Bonding Sheet
Before you begin applying the heat-activated bonding sheet, verify your sock is clean and dry to achieve the best results. Now, cut a piece of the bonding sheet slightly larger than the hole. This guarantees complete coverage and strong adhesion. Place the bonding sheet directly over the hole inside the sock, aligning it carefully.
Next, grab your iron and set it to a medium heat setting. With the sock inside out, press the iron onto the area where the bonding sheet sits. Hold it there for 10-15 seconds, applying gentle pressure. This process, one of the simplest fabric adhesion techniques, will fuse the sheet to the sock's fibers. Enjoy the freedom of a quick fix with these innovative bonding sheet applications!
Ensuring Long-Lasting Results
Now that you've successfully applied the bonding sheet, let's focus on making certain your fix lasts as long as possible. Start by considering durability factors. Choose a bonding sheet that matches the fabric type of your sock. Different materials have varying heat tolerances, so selecting the right sheet guarantees a stronger bond. Next, pay attention to fabric selection. If your socks are made from delicate materials like silk or cashmere, use a lower heat setting when activating the bond to avoid damage. For cotton or wool, a higher setting is usually safe. To maximize longevity, avoid using excessive force on the repaired area when wearing or washing. This attention to detail will help your DIY fix stand the test of time.
Reinforce With Fusible Webbing
When it comes to extending the life of your favorite socks, reinforcing holes with fusible webbing is an ingenious method that provides both strength and durability. This no-sew solution is perfect for those who crave simplicity and efficiency. Begin by cutting a piece of fusible webbing slightly larger than the hole. Place it over the damaged area, making sure it covers the perimeter well. Using a warm iron, press the webbing onto the sock, allowing the heat to bond the fibers effectively. This creates a seamless patch that blends effortlessly with your sock. The easy application not only guarantees a quick fix but also grants you the freedom to enjoy your beloved socks longer, without the hassle of needle and thread.
Seal the Hole With Liquid Stitch

Transform your worn socks with the innovative use of Liquid Stitch, a versatile adhesive that offers a seamless repair without the fuss of traditional sewing. Begin by ensuring the area around the hole is clean and dry. Apply a thin layer of Liquid Stitch over the hole, gently pressing the fabric together. This adhesive dries clear, providing a discreet fix that's both durable and flexible. With various liquid stitch applications available, you can explore alternatives like fabric glue, but Liquid Stitch remains a top choice for its ease and effectiveness.
This no-sew solution liberates you from the constraints of needle and thread, allowing you to effortlessly mend your socks. Embrace the freedom to repair your favorite pair, keeping them in rotation longer and saving on replacements.
Transform With Decorative Patches
While your socks may have seen better days, transforming them with decorative patches can breathe new life into these everyday essentials. Embrace your creativity and choose patches that showcase your personality. Think vibrant shapes, quirky characters, or minimalist patterns for a touch of individuality. The key is thoughtful patch placement—consider areas that not only cover holes but also add visual interest. Strategically place a colorful patch on the heel, or a whimsical design on the toe. With adhesive patches available, you don't need sewing skills. Simply press and secure, and let your imagination run wild. This innovative approach allows you to express yourself, turning old socks into unique fashion statements that reflect your free-spirited style, while keeping them functional.
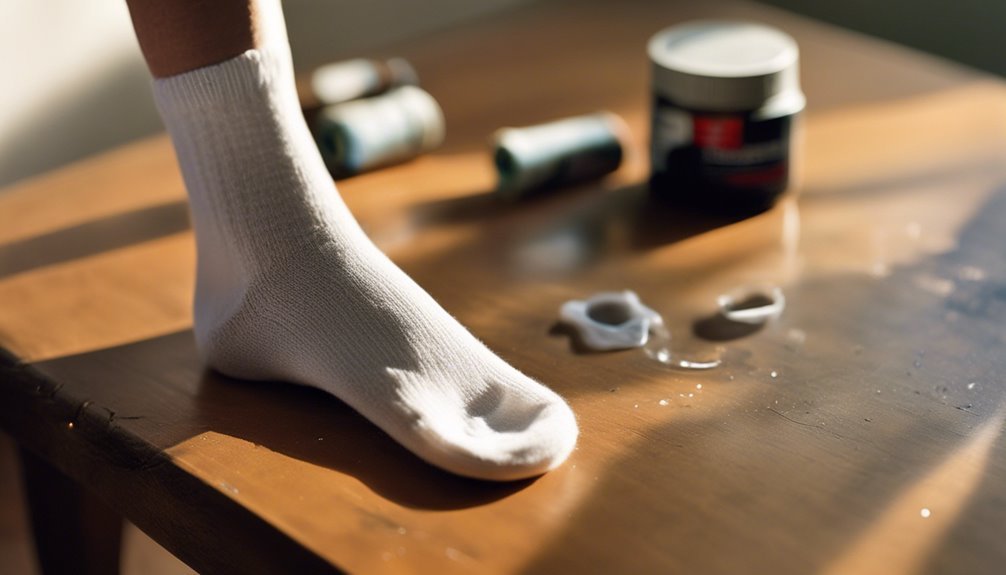
Utilize Clear Nail Polish for Small Holes
If you've got a small hole in your sock, clear nail polish might just be your secret weapon. This solution is as quick as it is clever. First, verify the sock is clean and dry. Then, apply a thin layer of clear nail polish around the hole's edges using a steady hand. This nail polish application acts like a glue, sealing the fibers and preventing further unraveling. The clear coat benefits extend beyond mere repair; it fortifies the fabric, making it more durable. Let it dry for a few minutes, and voilà! You've got an invisible fix that maintains the sock's flexibility. Embrace this liberating technique to extend the life of your socks, keeping them hole-free and ready for adventure.
Experiment With Hot Glue Gun Techniques
When it comes to reinforcing those pesky holes in your socks, a hot glue gun can be an unexpectedly versatile tool. Let your imagination run wild with creative applications. First, verify the sock is clean and dry. Turn it inside out, and place a piece of parchment paper inside to prevent sticking. Apply a thin layer of hot glue over the hole, gently spreading it with a toothpick for even coverage. For extra durability, add a second layer once the first is dry. Want a touch of flair? Use colored hot glue to create fun patterns or designs on the exterior. This method not only repairs but also personalizes your socks, letting you express your individual style with every step.
Frequently Asked Questions
Can These Methods Be Used on All Types of Sock Materials?
When considering sock material compatibility, you'll find repair method effectiveness varies. Most methods adapt to cotton, wool, and synthetic blends, but always test on a small area first. Innovate and explore, ensuring freedom from traditional sewing constraints.
How Long Do These DIY Fixes Typically Last?
You'll find that these DIY fixes offer temporary durability, with longevity expectations varying by use and material. They're a resourceful solution, perfect for those seeking innovative, quick fixes that grant you the freedom to keep moving.
Are These Methods Safe for Machine Washing?
You're wondering about sock durability and washing techniques. Most methods hold up well in gentle cycles, but it's wise to air dry. This gives you freedom to enjoy longer-lasting socks without constant repair. Embrace innovation!
What Are the Cost Comparisons Between These Techniques?
Crafting cost-effective creations can truly transform your budget. When comparing these techniques, you'll discover delightful, diverse options. Some solutions are surprisingly affordable, allowing you to innovate without investing heavily, ensuring your financial freedom remains remarkably intact.
Can These Fixes Cause Skin Irritation or Allergies?
You might wonder if these methods could trigger skin sensitivity or allergy reactions. Always test materials on a small skin patch first. Opt for hypoallergenic products to guarantee freedom from unwanted discomfort while exploring innovative solutions.